Appearance
iOS Push Notification Integration
Comprehensive guide for integrating push notifications in your iOS Flutter app using the Upshot.ai SDK.
Prerequisites
- Apple Developer Account
- Push Notification certificate (.p12 or .p8 file)
- Provisioning profile with push capability
- Xcode project with push notifications enabled
Configuration
- Configure your app for push notifications APNS
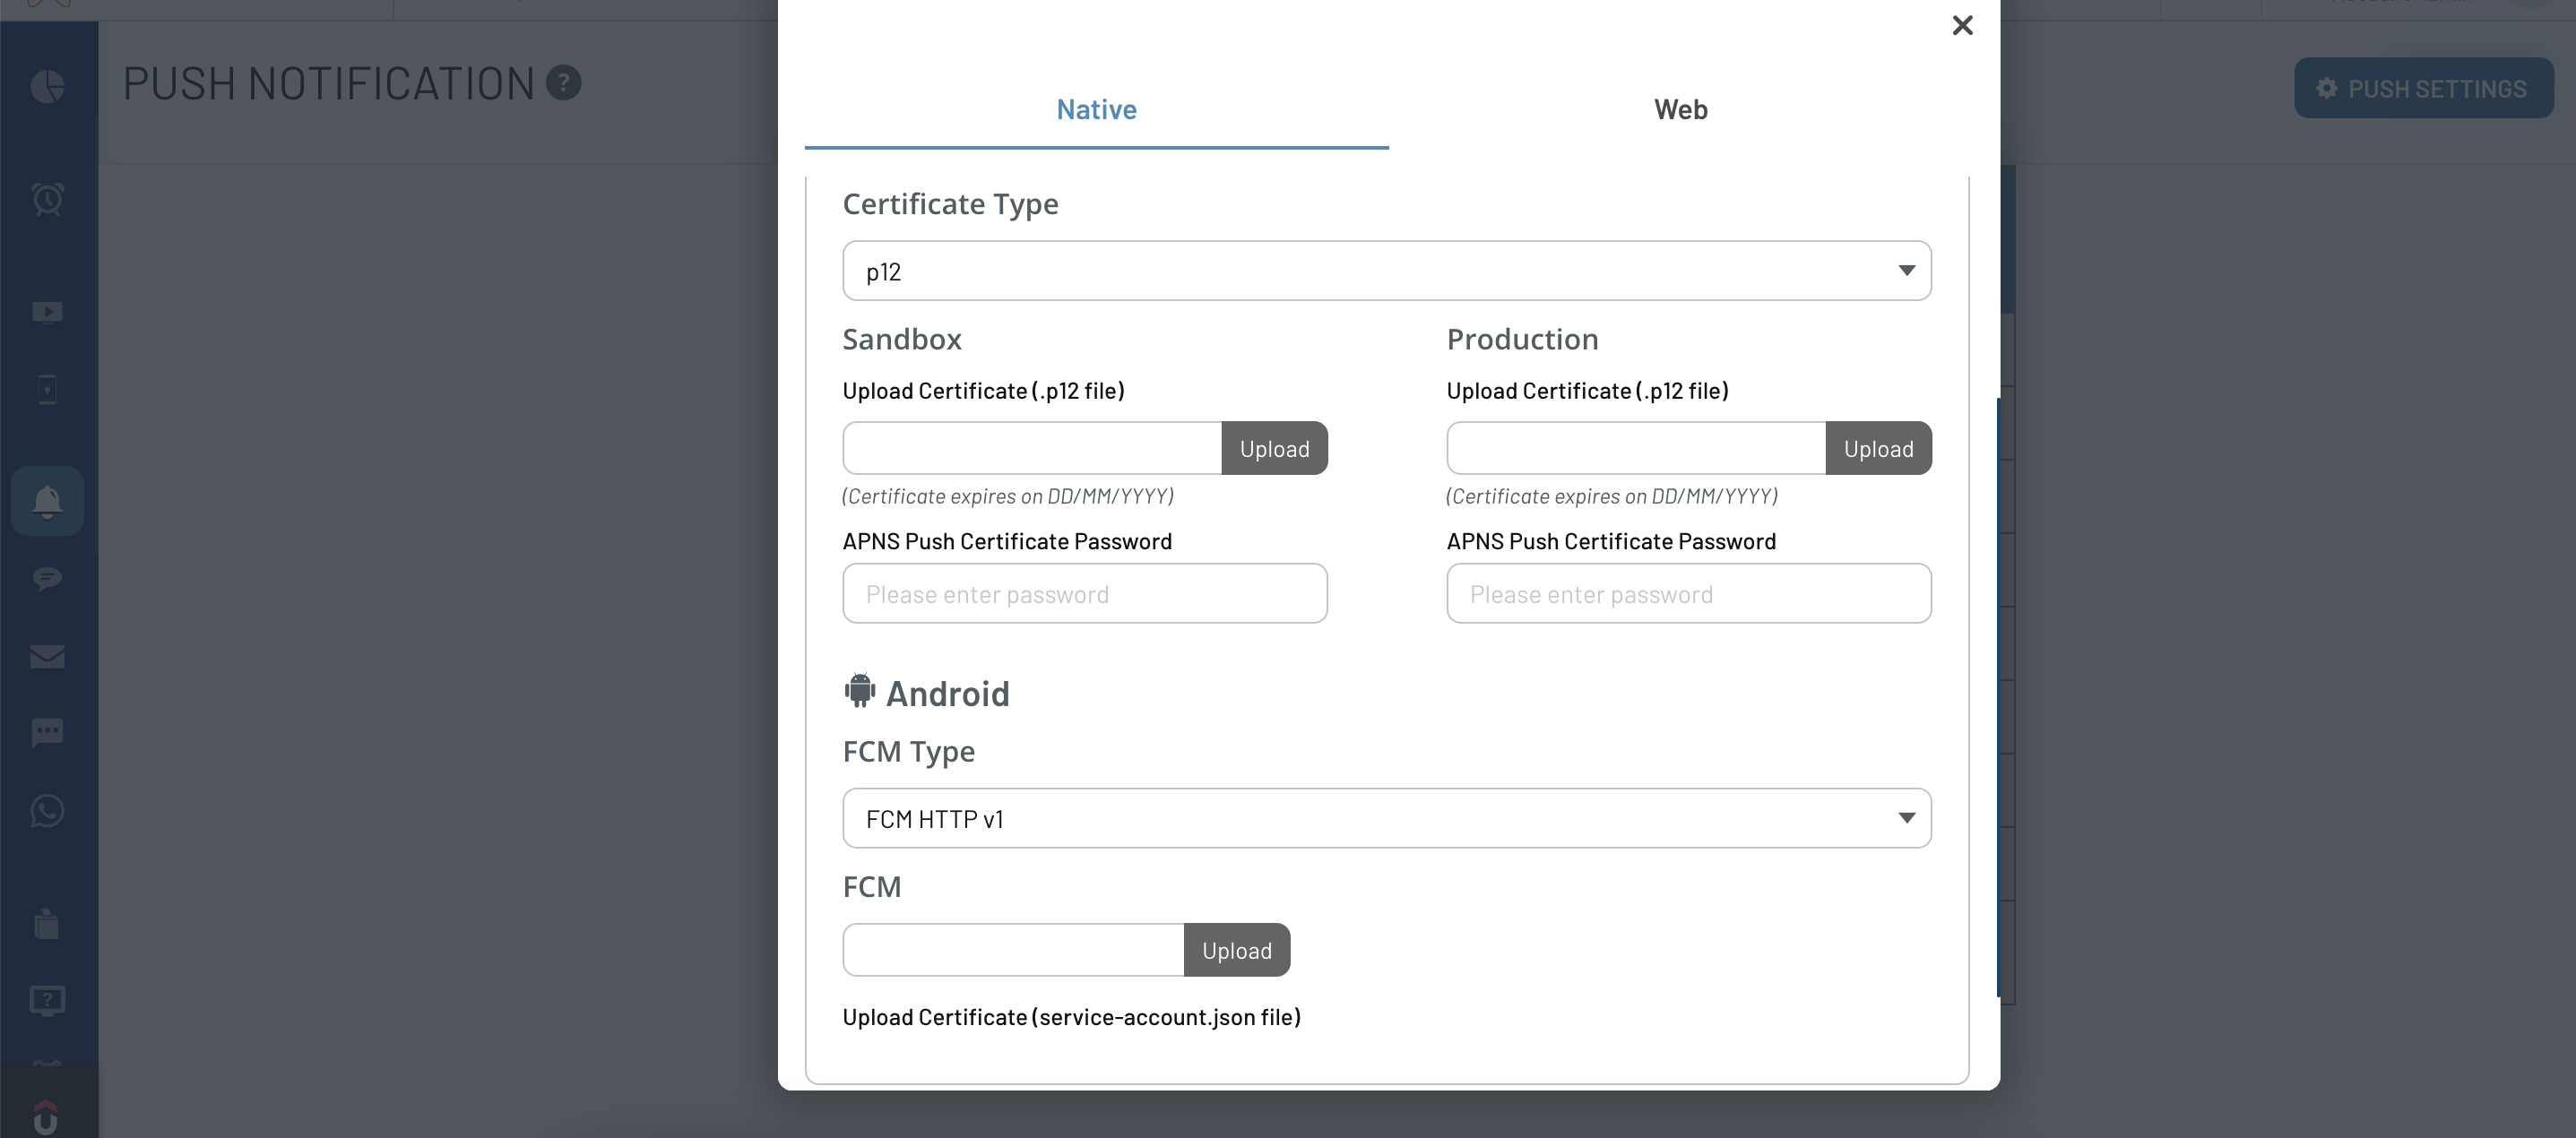
- Configure your push notifications in Upshot.ai by uploading your .p12 or .p8 file in the Dashboard under the Push Notifications section.
Enable Push Capability
- In Xcode, select your target
- Go to "Signing & Capabilities"
- Click "+" and add "Push Notifications"
Rich/Enhanced Notifications
iOS 10 brings us push notifications with Rich Media Attachment which includes viewing photos, videos, gifs and audio right there, within the notification.
Having these media attachments as a part of your notification is achieved with the use of the new Notification Service Extension. You can also have richer view controller level content within the media attachment view of the notification using Notification Content Extension.
NOTE
Upshot.ai supports Rich Media Attachment and Push Notification Templates:
- Rich/Media Push notifications are enabled by using notification service extension
- Push Notification Templates are enabled by using notification content extension
- Upshot.ai will track push notification viewed count automatically - for this we need to enable App Groups in capabilities
Enable App Groups
- Select your App Target → Select Capabilities → Search for App Groups
- Enable App Groups and create a new App Group ID
App Group ID Recommendation
IMPORTANT
To support Push Notification View count and Templates, it's recommended to have a separate App Group ID set for Upshot.ai with format: group.{app bundle id}.Upshot
Make sure that same group id is enabled for all the targets (App Target, Notification Service Extension and Notification Content Extension)
Setup Steps:
- Enable App Groups for your target and enable app group ids
- If you don't have an App Group ID, create new one with
group.{app bundle id}.Upshot - Enable background mode and enable remote notifications
- Enable Push Notifications capability for your app
Notification Service Extension Setup
1. Create a Notification Service Extension Target
To create a notification service extension in your project, in Xcode, select File → New → Target → Choose Notification Service Extension template and activate.
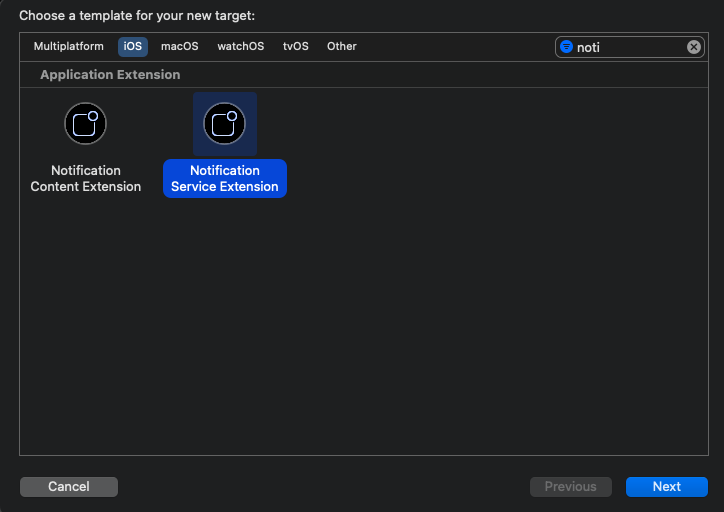
Set the name of the extension target and the programming language which you want to use. Activate the scheme for Extension when prompted for the same.
2. Add UserNotifications framework to extension target
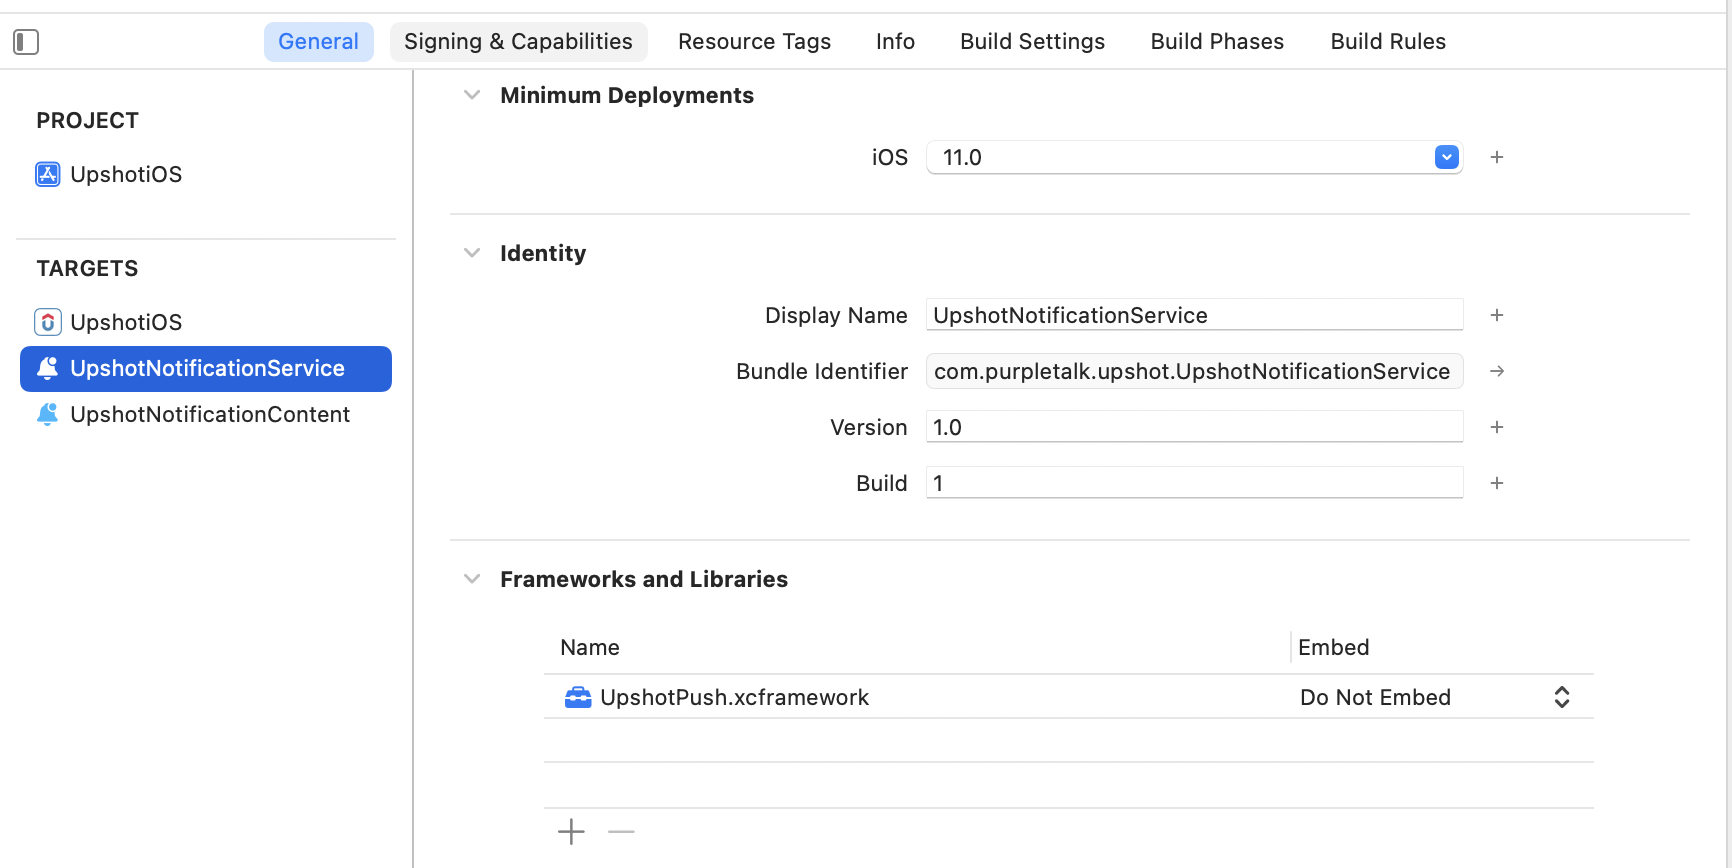
Add UserNotifications framework and UpshotPush.xcframework framework to Linked Frameworks and Libraries of notification service extension target as shown below:
3. Set the App Group ID for Extension
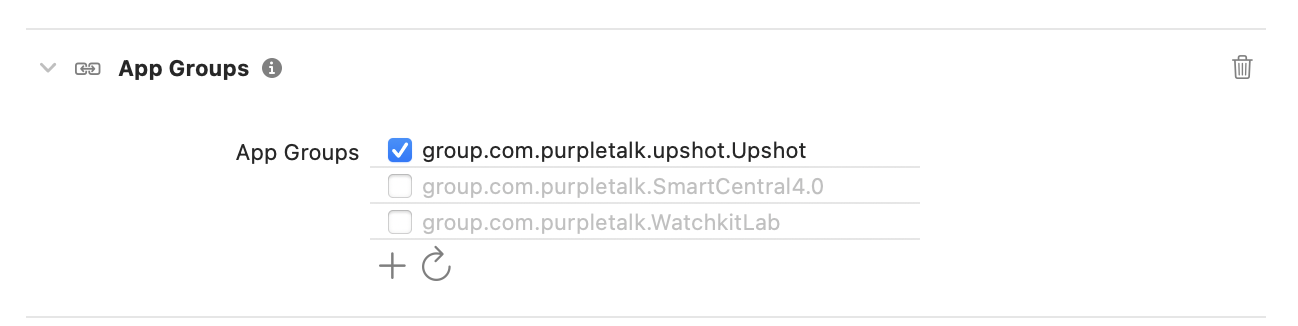
Enable App Groups for your notification service extension target and enable the same App group ID which was selected for the App Target:
4. Code Level Changes
- Import UpshotPush in NotificationService class
- NotificationService extends with UNNotificationServiceExtension by default
- Replace UNNotificationServiceExtension with UpshotNotificationService
4. Code Level Changes
- Import UpshotPush in NotificationService class
- NotificationService extends with UNNotificationServiceExtension by default
- Replace UNNotificationServiceExtension with UpshotNotificationService
objc
// Import Upshot in NotificationService.h
#import <UpshotPush.h>

// NotificationService.h
@interface NotificationService : UpshotNotificationService

@end

// NotificationService.m
@implementation NotificationService

// UpshotNotificationService will handle the rich media processing automatically

@end
swift
// Import Upshot in NotificationService.swift
import UpshotPush

// NotificationService.swift
class NotificationService: UpshotNotificationService {

    // UpshotNotificationService will handle the rich media processing automatically

}
Notification Content Extension Setup
1. Create a Notification Content Extension Target
To create a notification content extension in your project, in Xcode, select File → New → Target → Choose Notification Content Extension template and activate.

Set the name of the extension target and the programming language which you want to use. Activate the scheme for Extension when prompted for the same.
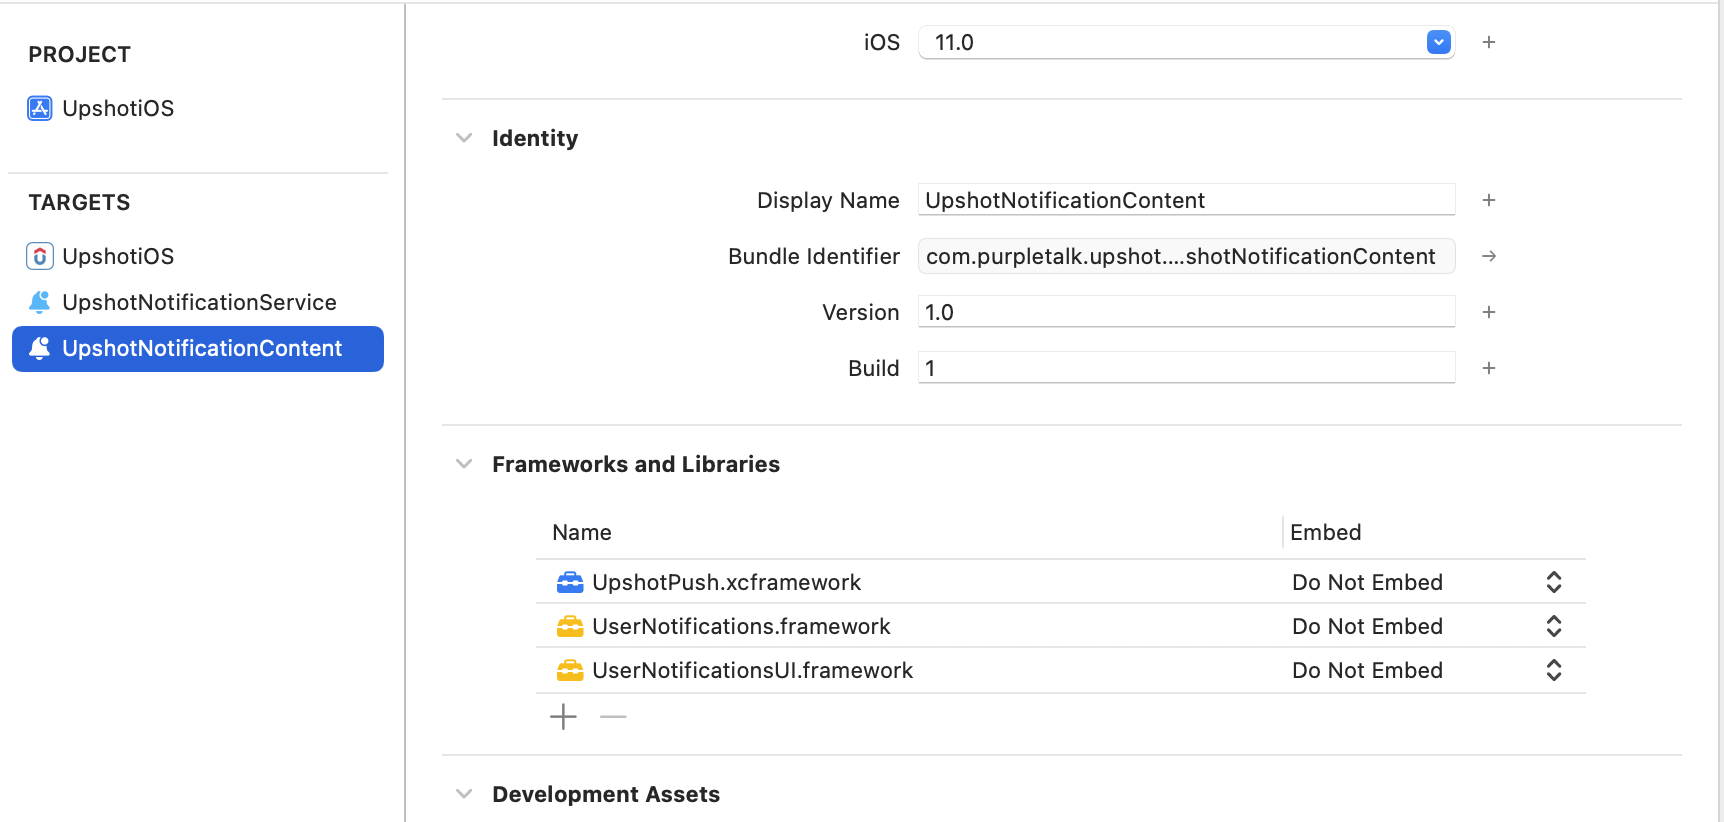
2. Add UserNotifications and UserNotificationsUI framework to extension target
Add UserNotifications, UserNotificationsUI framework and UpshotPush.xcframework framework to Linked Frameworks and Libraries of notification content extension target as shown below. And set the deployment target to 12.0
3. Set the App Group ID for Extension
Set App Groups in your Notification Content Extension target and enable the same App group ID which was selected for the App Target:
4. Info.plist Changes
The changes in the Info.plist of your Notification Content Extension, as shown below, set NSExtensionAttributes as following:
xml
<key>NSExtensionAttributes</key>
<dict>
    <key>UNNotificationExtensionCategory</key>
	<string>Upshot_PushTemplate</string>
	<key>UNNotificationExtensionDefaultContentHidden</key>
	<true/>
	<key>UNNotificationExtensionInitialContentSizeRatio</key>
	<real>0.2</real>
	<key>UNNotificationExtensionUserInteractionEnabled</key>
	<true/>
</dict>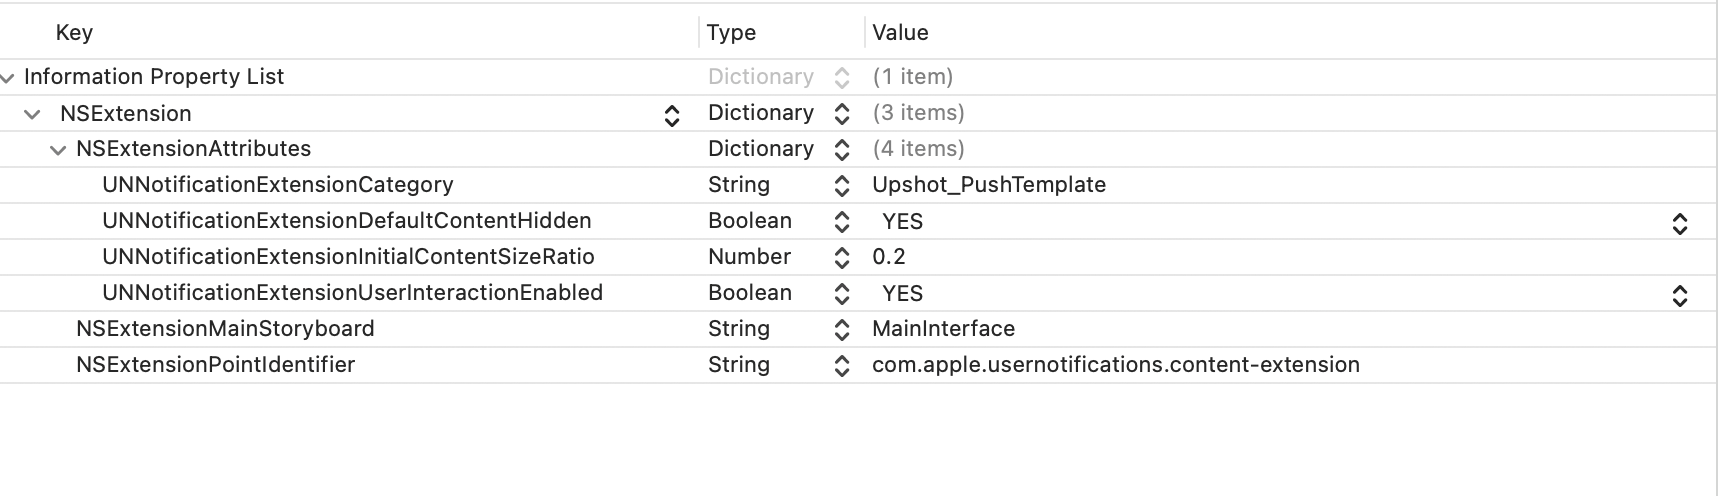
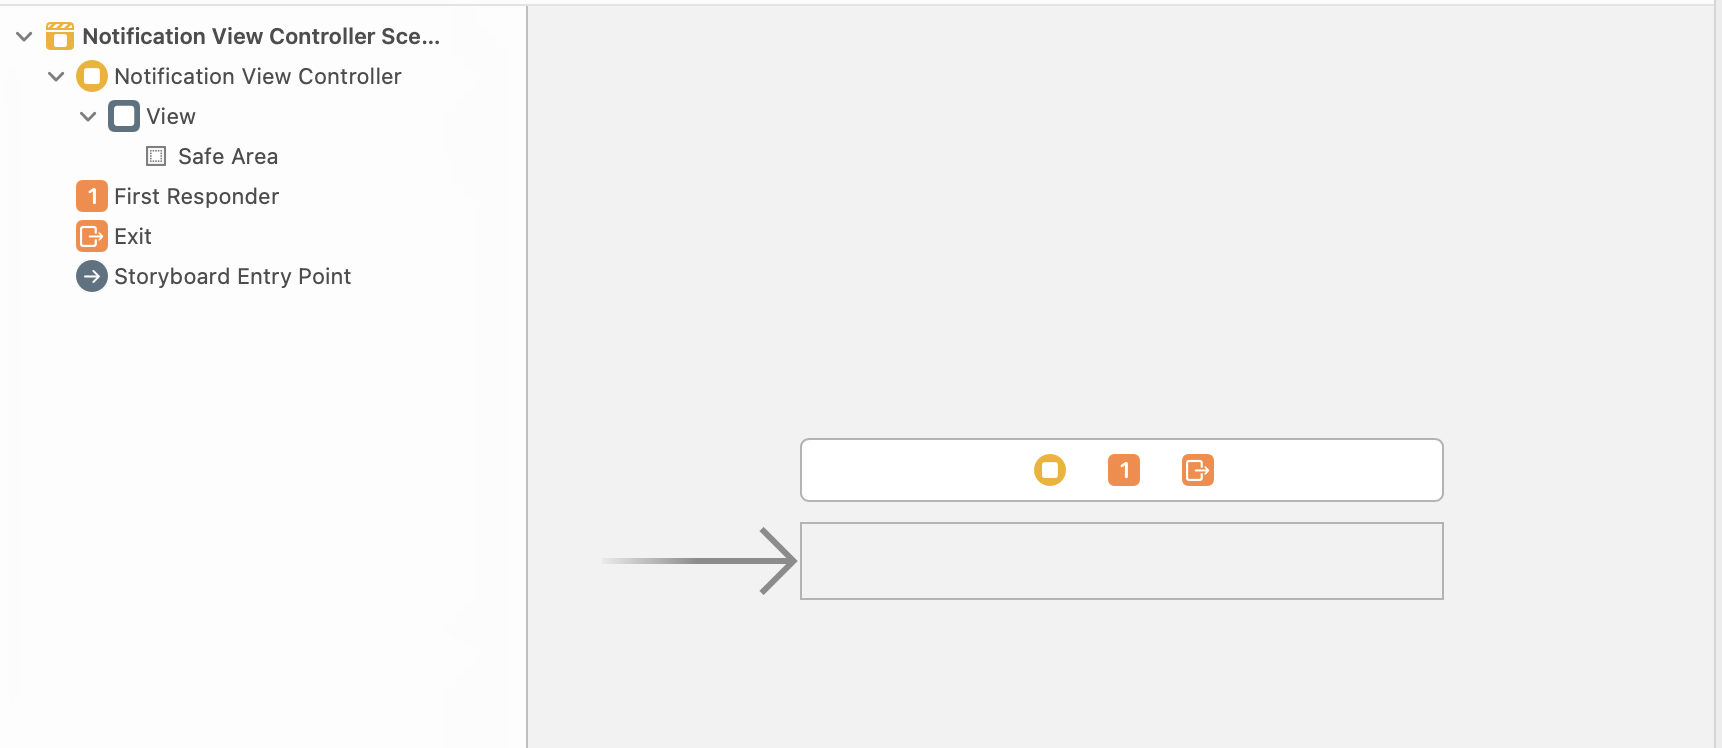
5. Storyboard Changes
Select MainInterface.storyboard in your Content extension and remove the default label which is placed there and set the background color of the view to clear color, as shown below.
6. Code Level Changes
- Import UpshotPush in NotificationViewController
- Invoke displayEnhancePushWithController Upshot.ai method in didReceiveNotification method
objc
#import <UIKit/UIKit.h>
@import UpshotPush;

// NotificationViewController.h
@interface NotificationViewController : UIViewController <UNNotificationContentExtension>

@end

// NotificationViewController.m
@implementation NotificationViewController

- (void)didReceiveNotification:(UNNotification *)notification {
    // Invoke displayEnhancePushWithController Upshot.ai method
    UpshotNotificationContent *notificationContent = [[UpshotNotificationContent alloc] init];
    [notificationContent displayEnhancePushWithController:self notification:notification];
}

@end
swift
// Import Upshot in NotificationViewController.swift
import UpshotPush
import UserNotifications
import UserNotificationsUI

// NotificationViewController.swift
class NotificationViewController: UIViewController, UNNotificationContentExtension {

    func didReceive(_ notification: UNNotification) {
        // Invoke showEnhancedPushNotification Upshot.ai method
        let notificationContent = UpshotNotificationContent()
        notificationContent.displayEnhancePush(controller: self, notification: notification)
    }
}
Rich Notification Features
With Rich Notifications enabled, your app will support:
Rich Media Attachments
- Images (JPEG, PNG)
- Videos (MP4)
- Audio files
- Animated GIFs
Push Notification Templates
- Custom layouts
- Interactive elements
- Branded experiences
- Call-to-action buttons
Testing Rich Notifications
- Send test notifications from Upshot.ai dashboard with media attachments
- Verify media display in notification center and lock screen
- Test template rendering with different content types
- Validate App Group functionality across all targets
Best Practices
Development
- Optimize media size - Keep images under 500kb, videos under 5MB
- Test on different devices - Verify across various iOS versions and devices