Push Notification
Push messaging allows you to keep your users up-to-date and re-engage them with your app after periods of inactivity. Upshot.ai makes it simple to send push notifications through Application Push Notification Service(APNS). Upshot.ai also supports pushing an activity along with the Push.
Below are the steps to follow setting up your app for push notifications:
Generate APNS Certificate for iOS Push Notifications
If you already have a push certificate, you can skip these steps.
- Login to Apple developer account and click on Certificate,
Identifiers and Profiles.
 ×
×
![]()
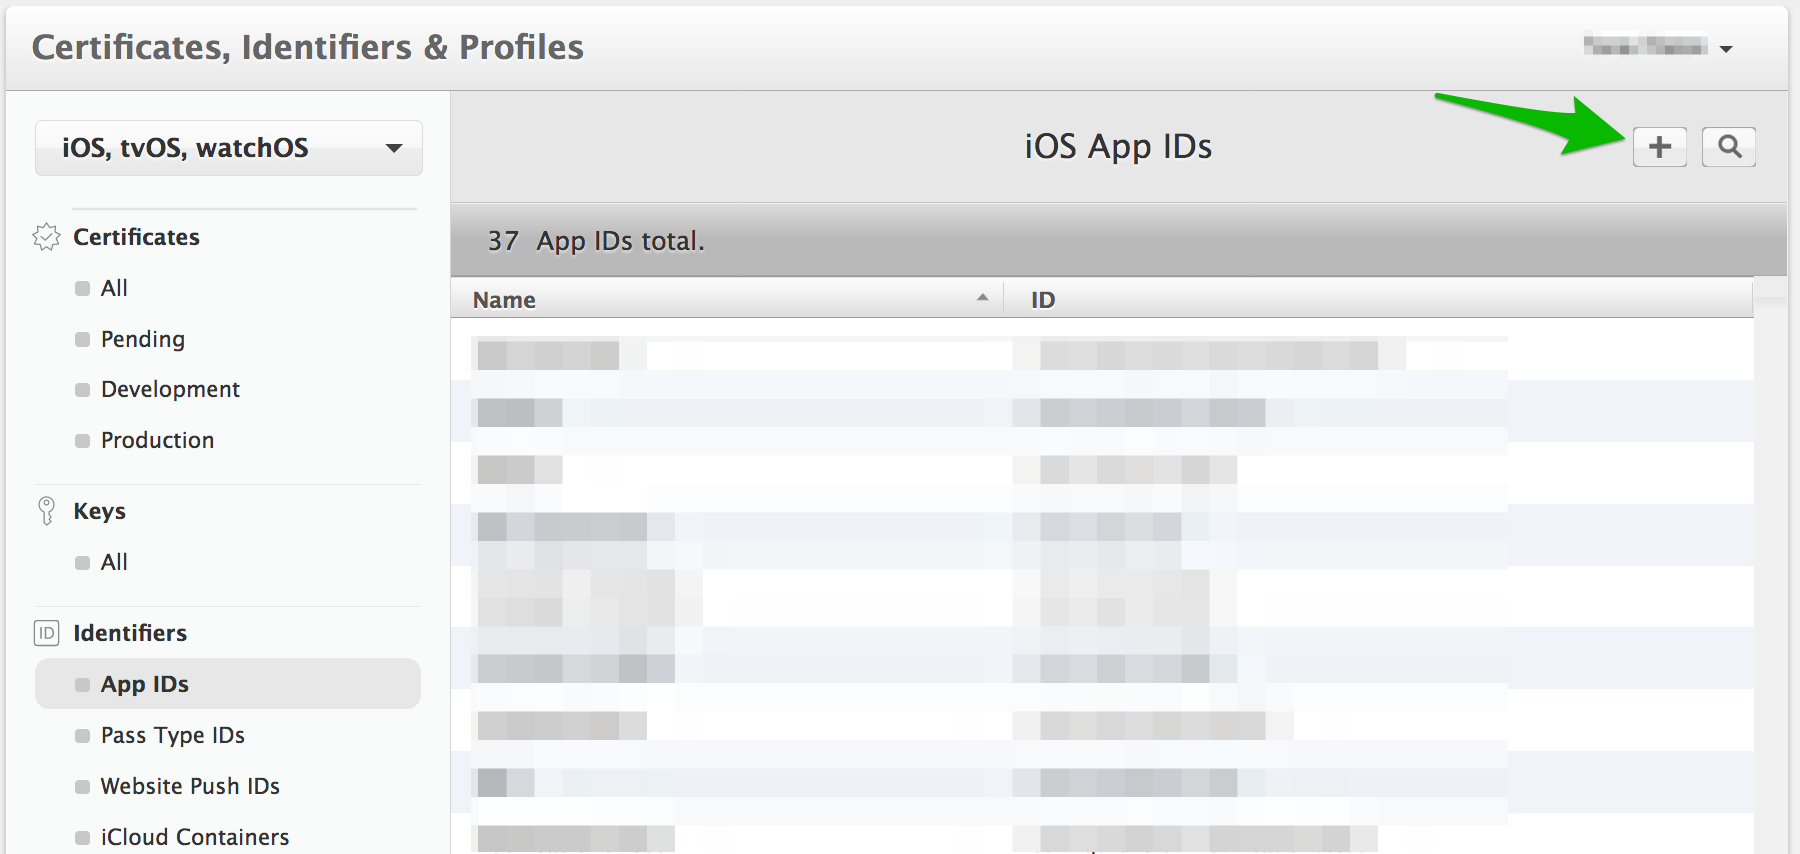
- On the next screen, select Identifiers > App IDs in the left sidebar and then click on the
plus button in the top right corner
 ×
×
![]()
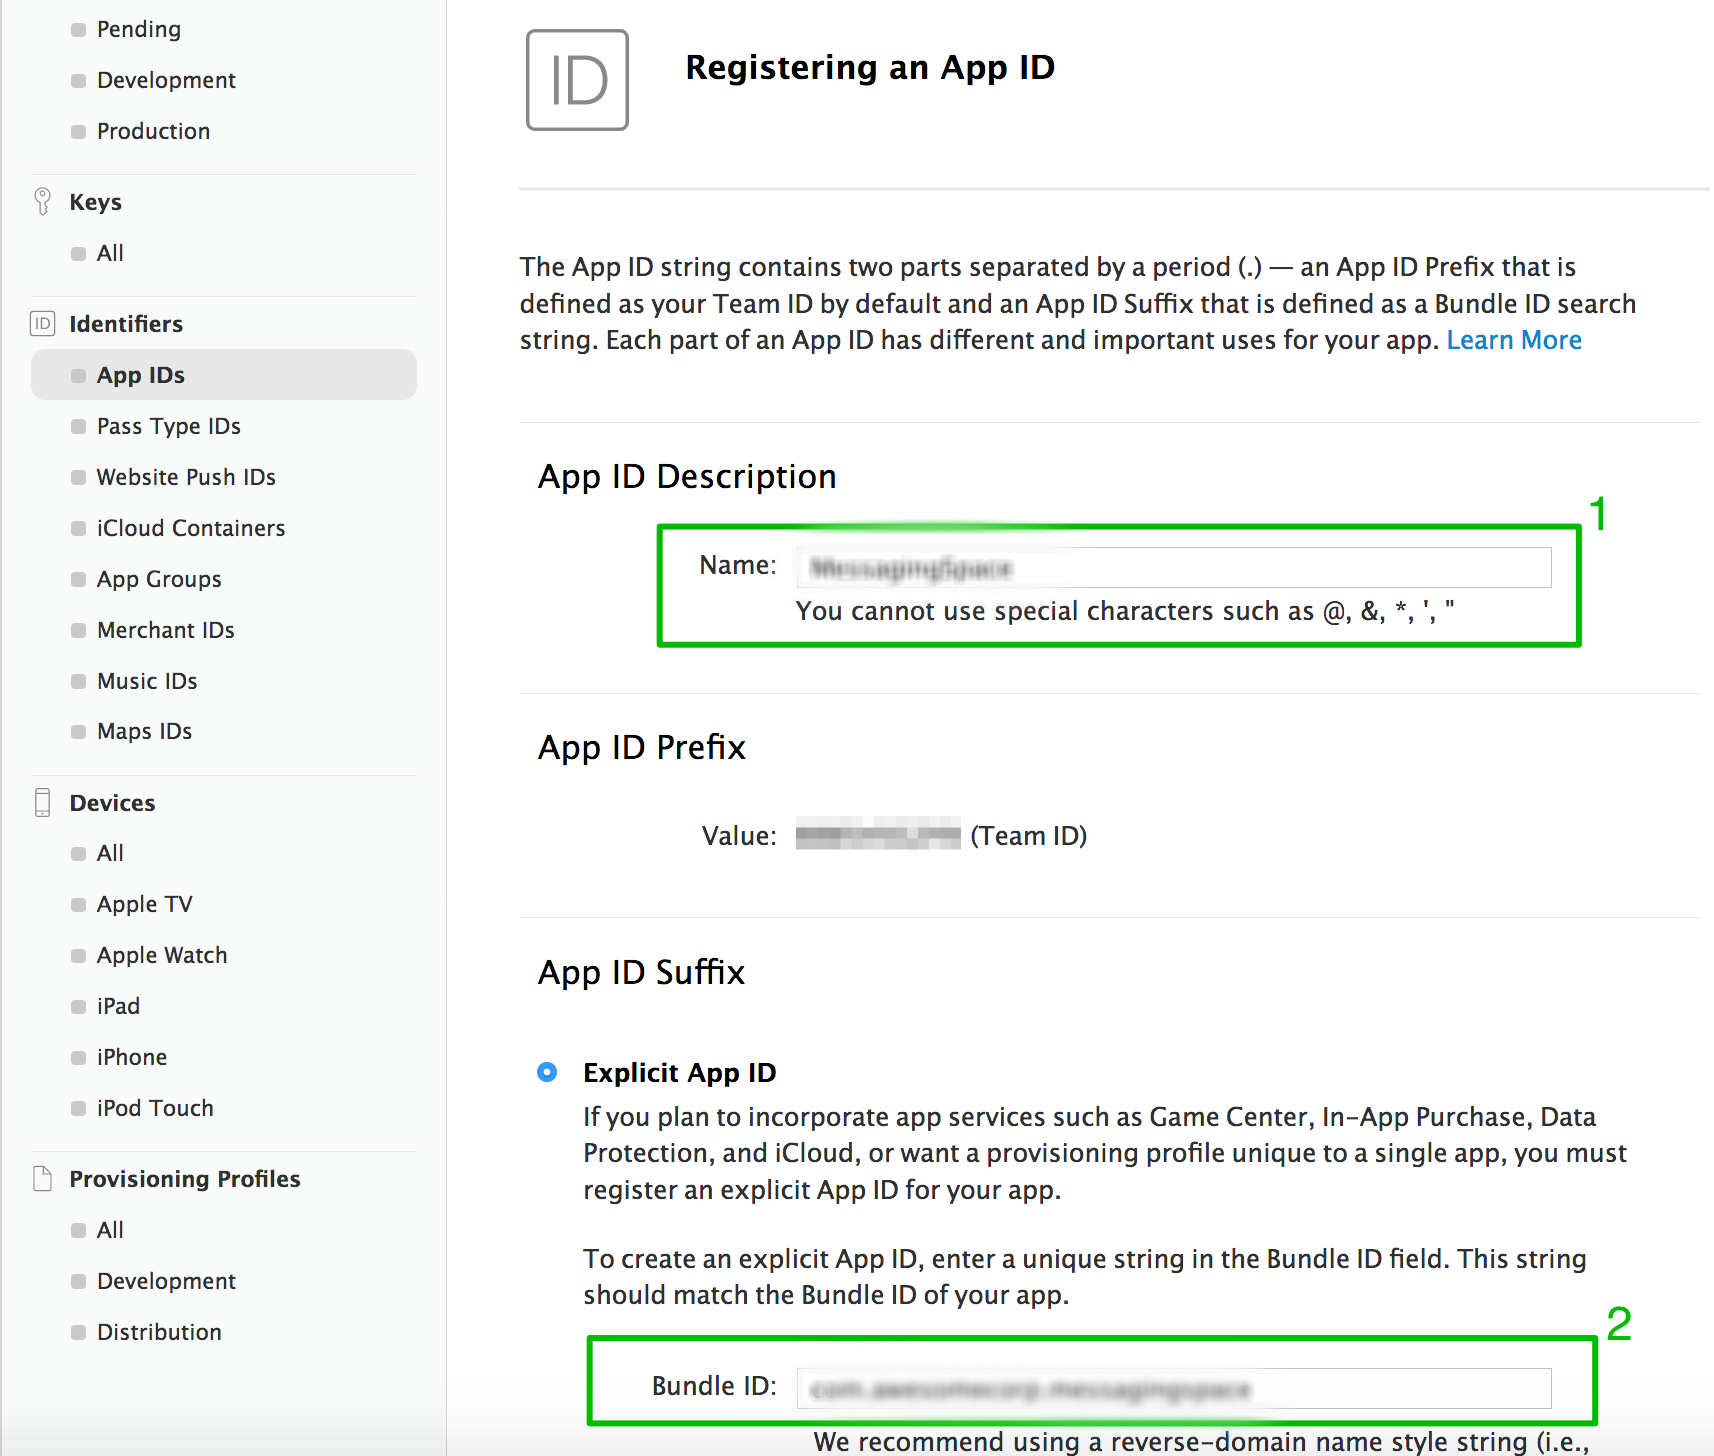
- Enter your app name for the App ID Description section (1). In the App ID Suffix section, select the Explicit
App ID option and enter Bundle Identifier(2).
 ×
×
![]()
Note: Ensure you have created an App ID without a wildcard(make sure it doesn’t have an
asterisk in it). Wildcard IDs cannot use the push notification service
- Once you have entered all of the information, scroll down to the bottom of the page and select Continue
button. You will now be presented with an overview of your new app ID. Click Register button to continue.
- Generate a Certificate Signing Request:
You need to generate a certificate signing request file so that you can use it to request an APNS SSL
certificate later on
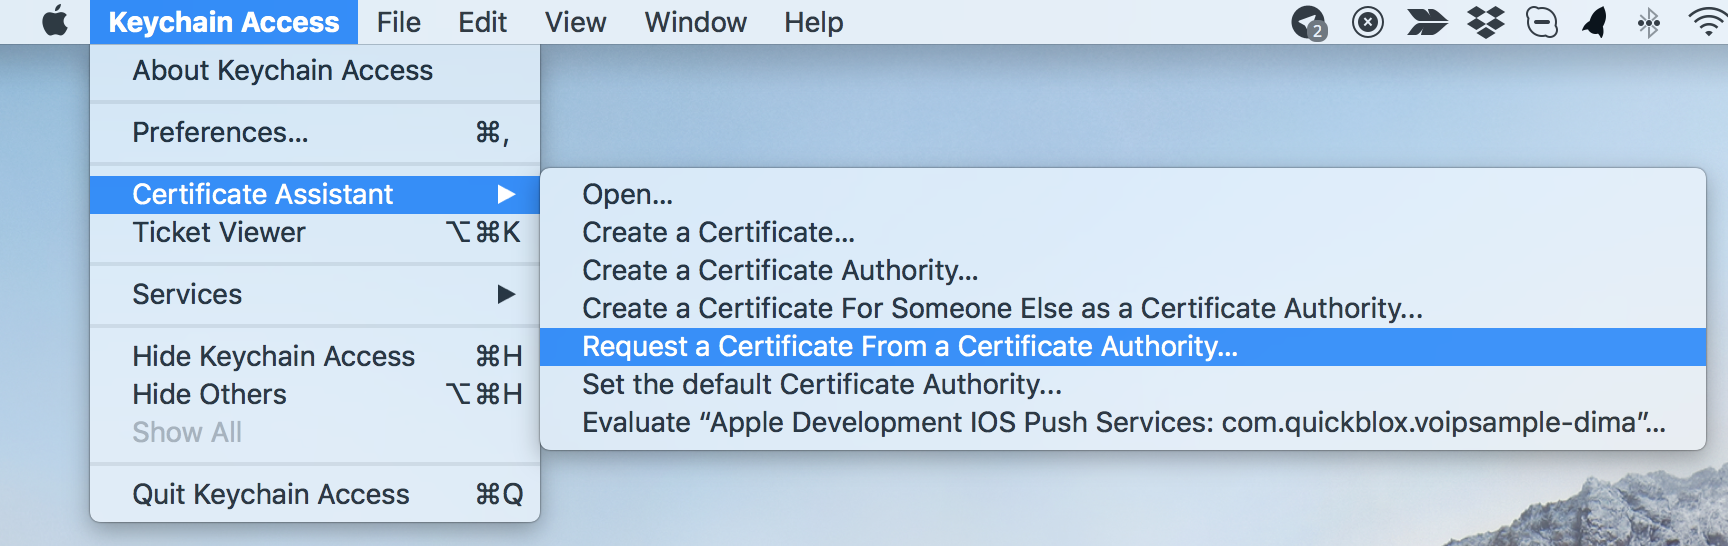
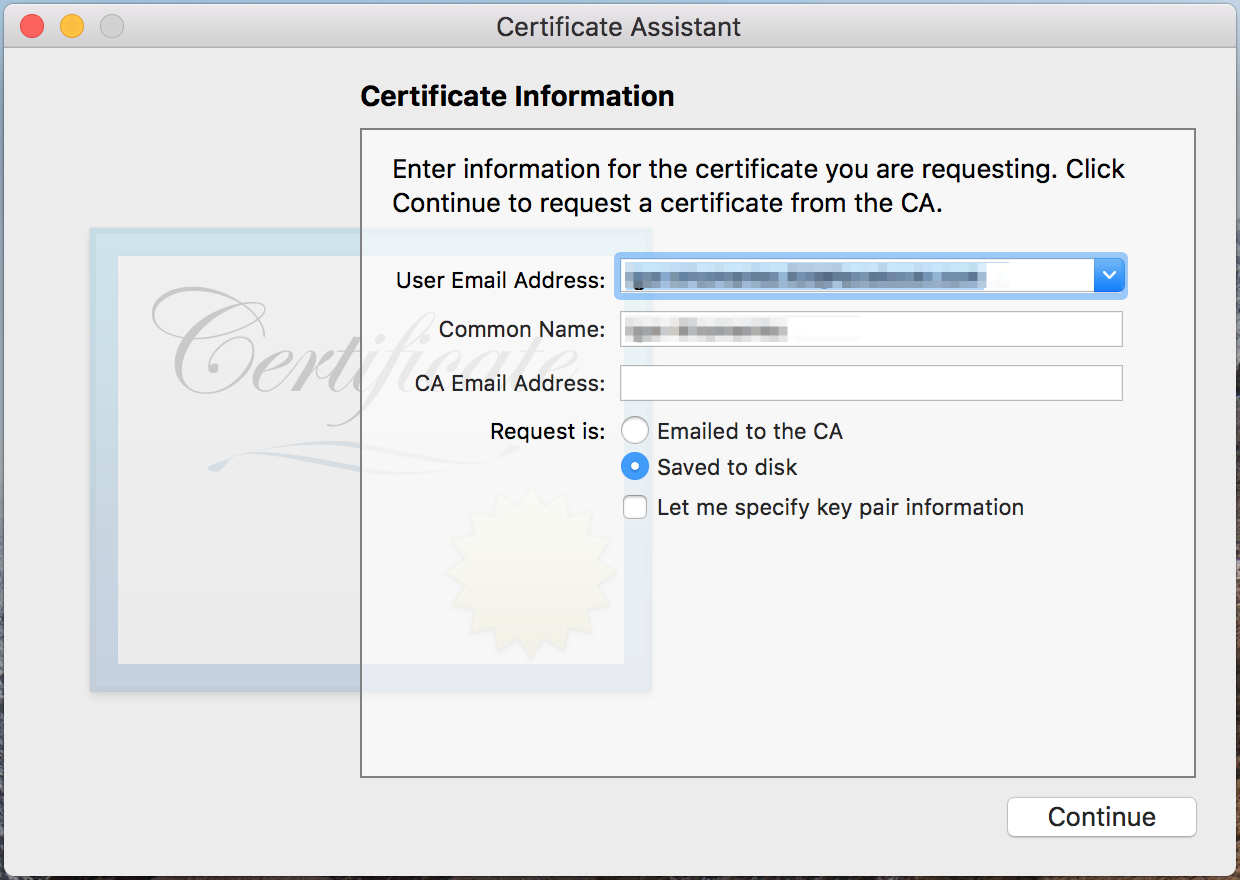
- Select Keychain Access -> Certificate Assistant -> Request a Certificate From a Certificate
Authority
 ×
×
![]()
- Enter the required information and check the 'Saved to disk' option. Click Continue and Save
 ×
×
![]()
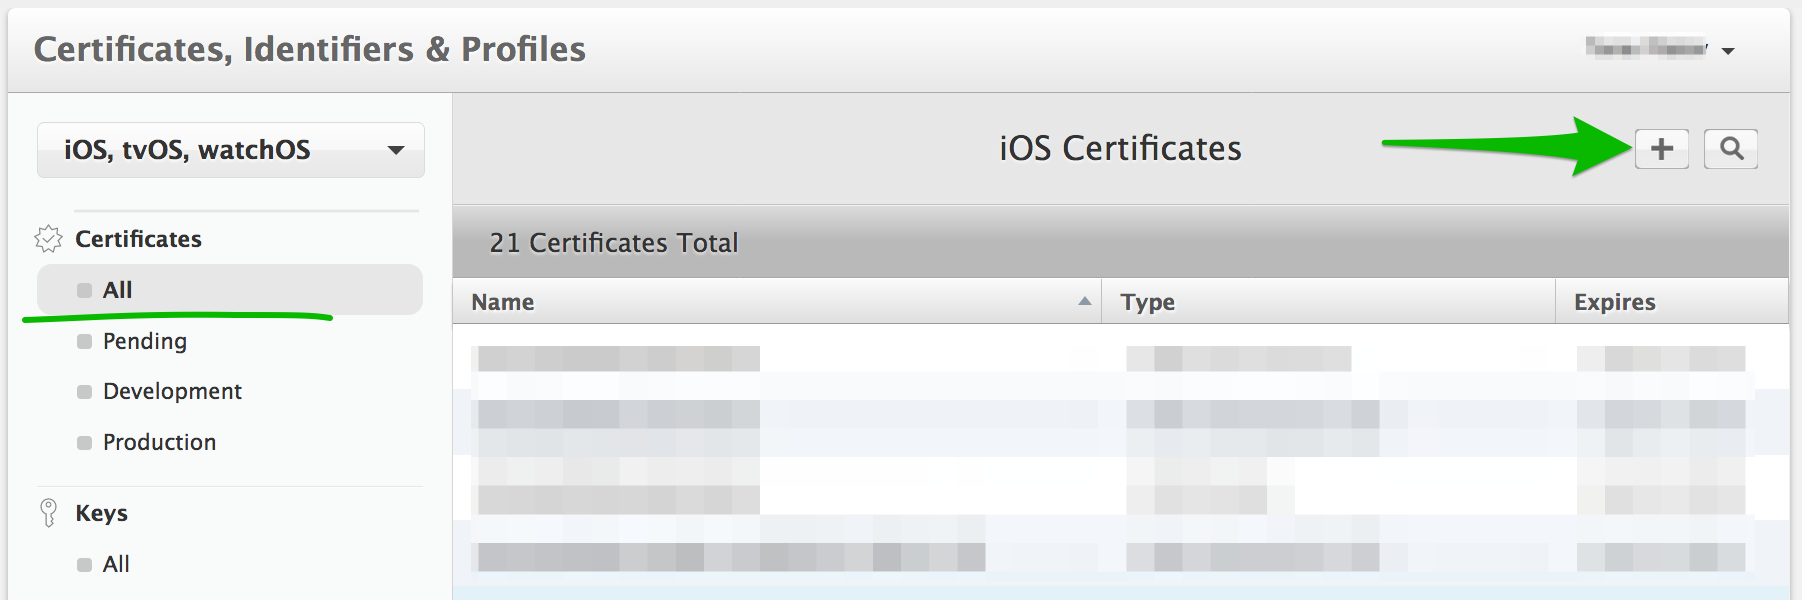
- Create universal APNS certificate
On the Certificates, IDs & Profiles screen, select Certificates > All in the left sidebar and
then click on the plus button in the top right corner:
 ×
×
![]()
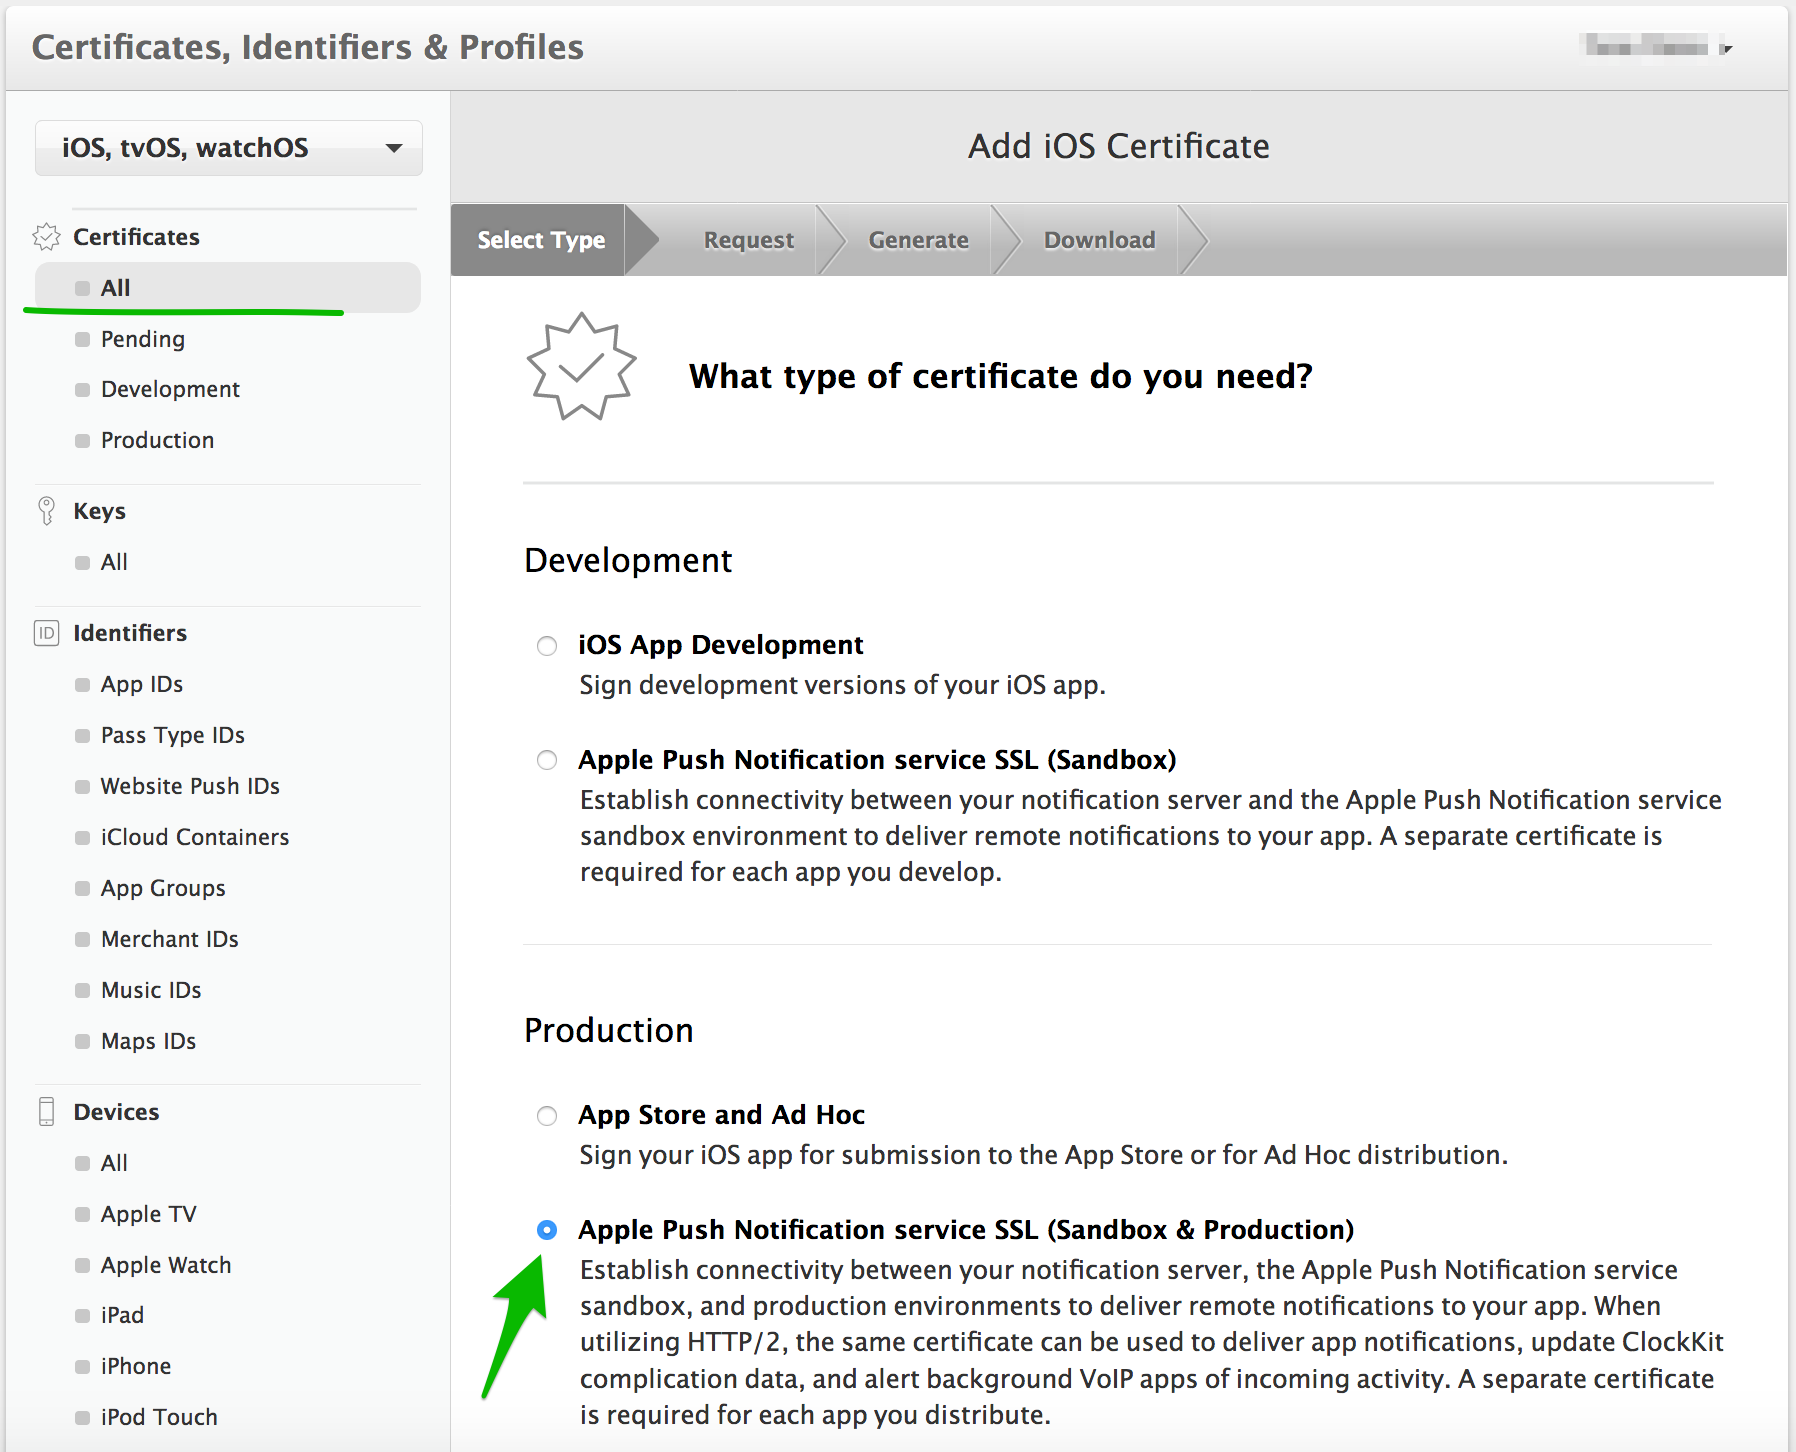
- The Add iOS Certificate screen will appear. Choose Apple Push Notifications service SSL (Sandbox &
Production) and click Continue
 ×
×
![]()
Here we will create a single universal push certificate which is good for both Development and Production
environments
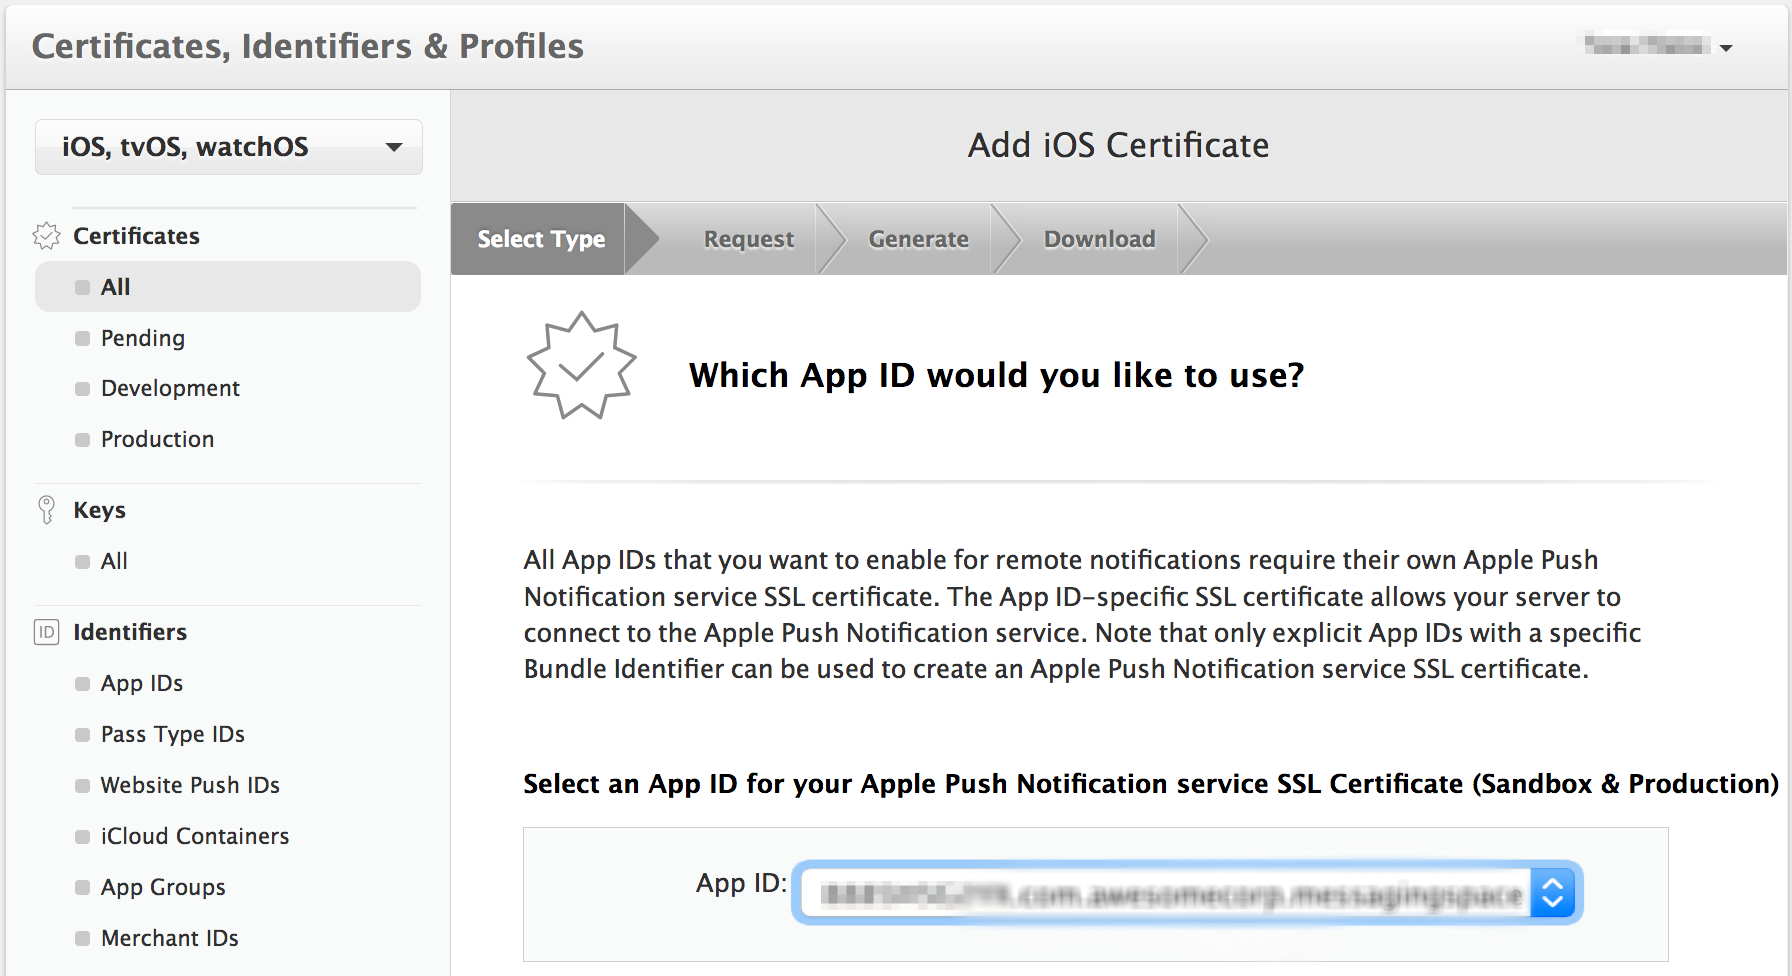
- On the next screen choose an App ID you want to create a push certificate for. Then click Continue
 ×
×
![]()
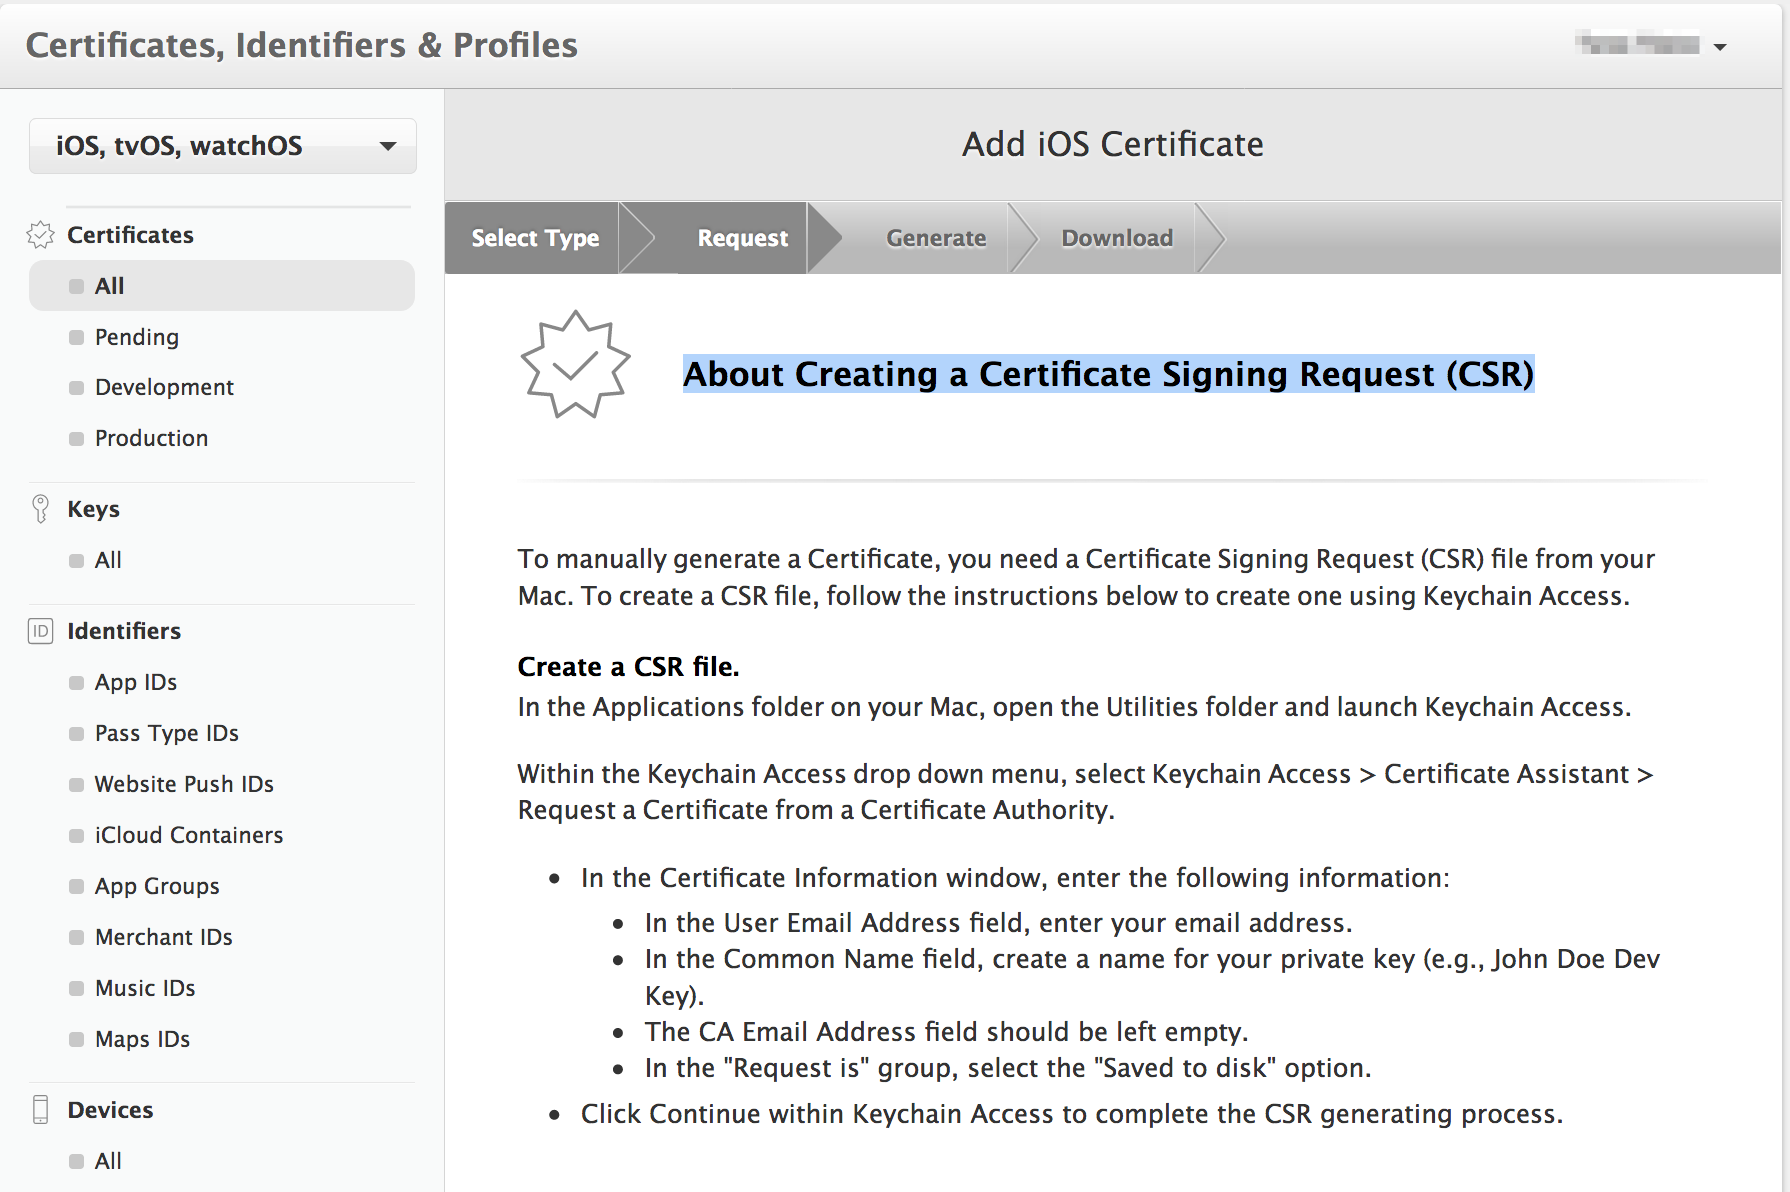
- On the next screen About Creating a Certificate Signing Request (CSR) click Continue
 ×
×
![]()
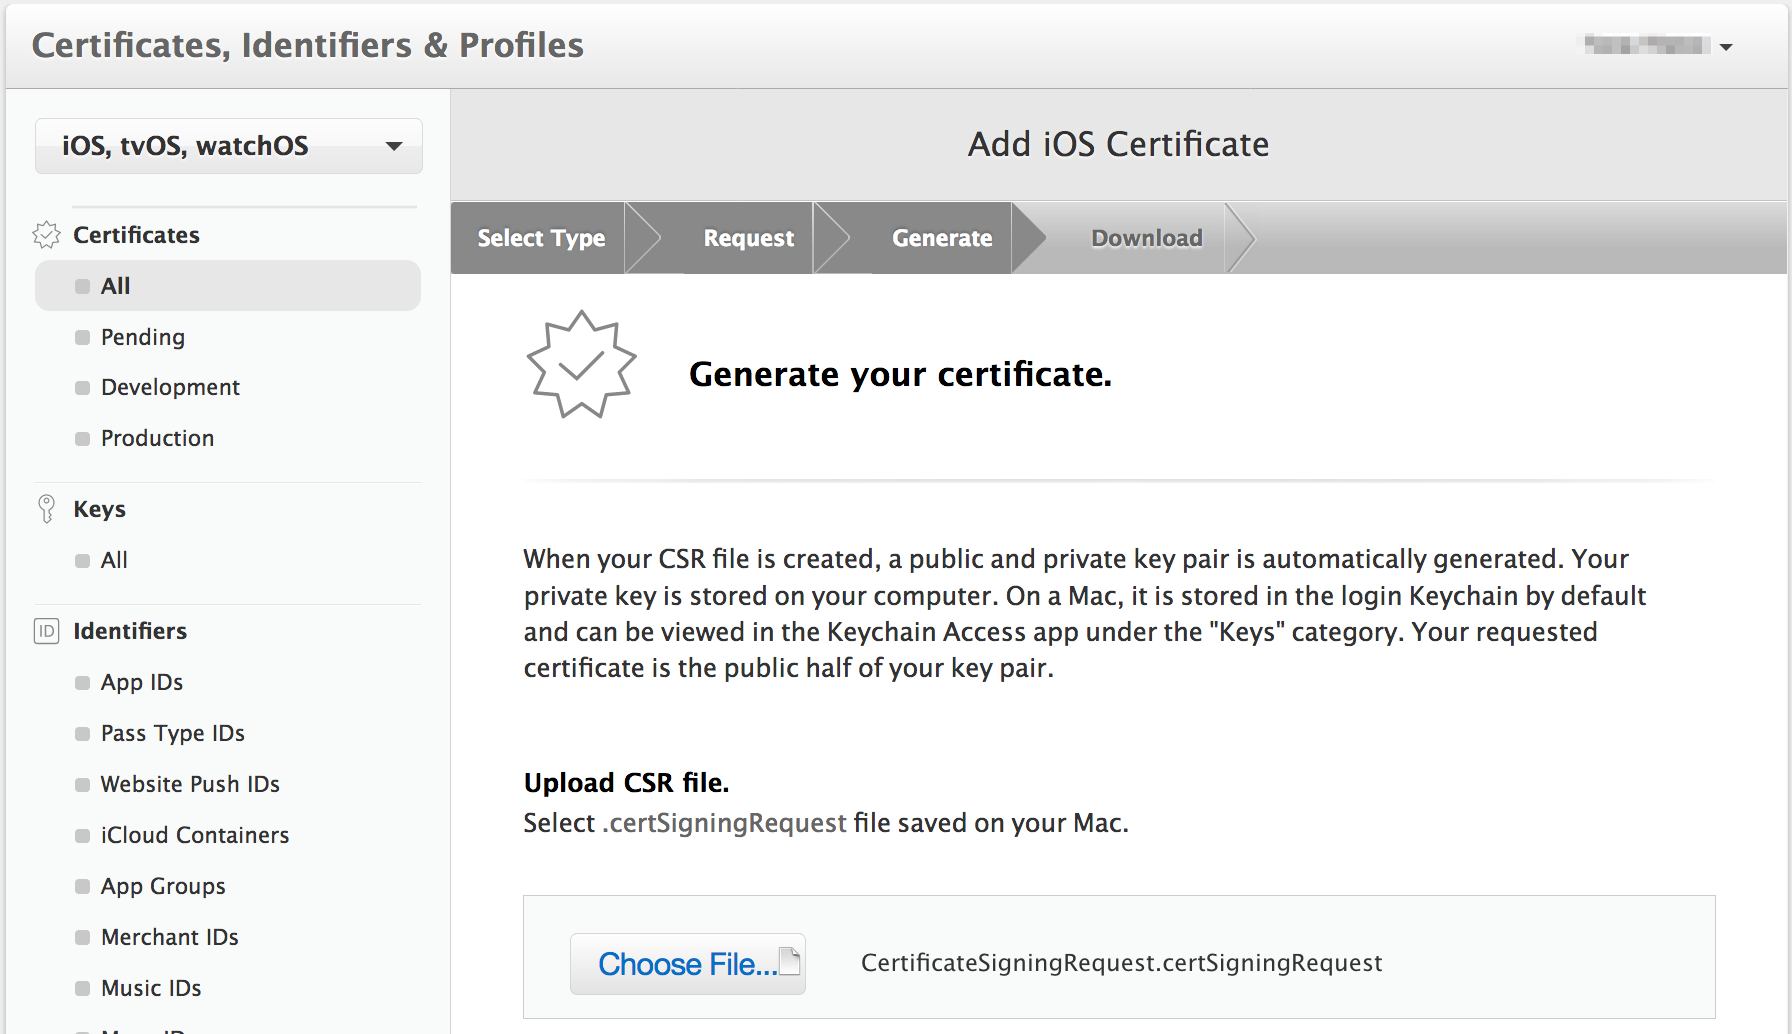
- Click 'Choose File...' button to locate Certificate Request File that you have saved earlier. Click Generate:
and Download
 ×
×
![]()
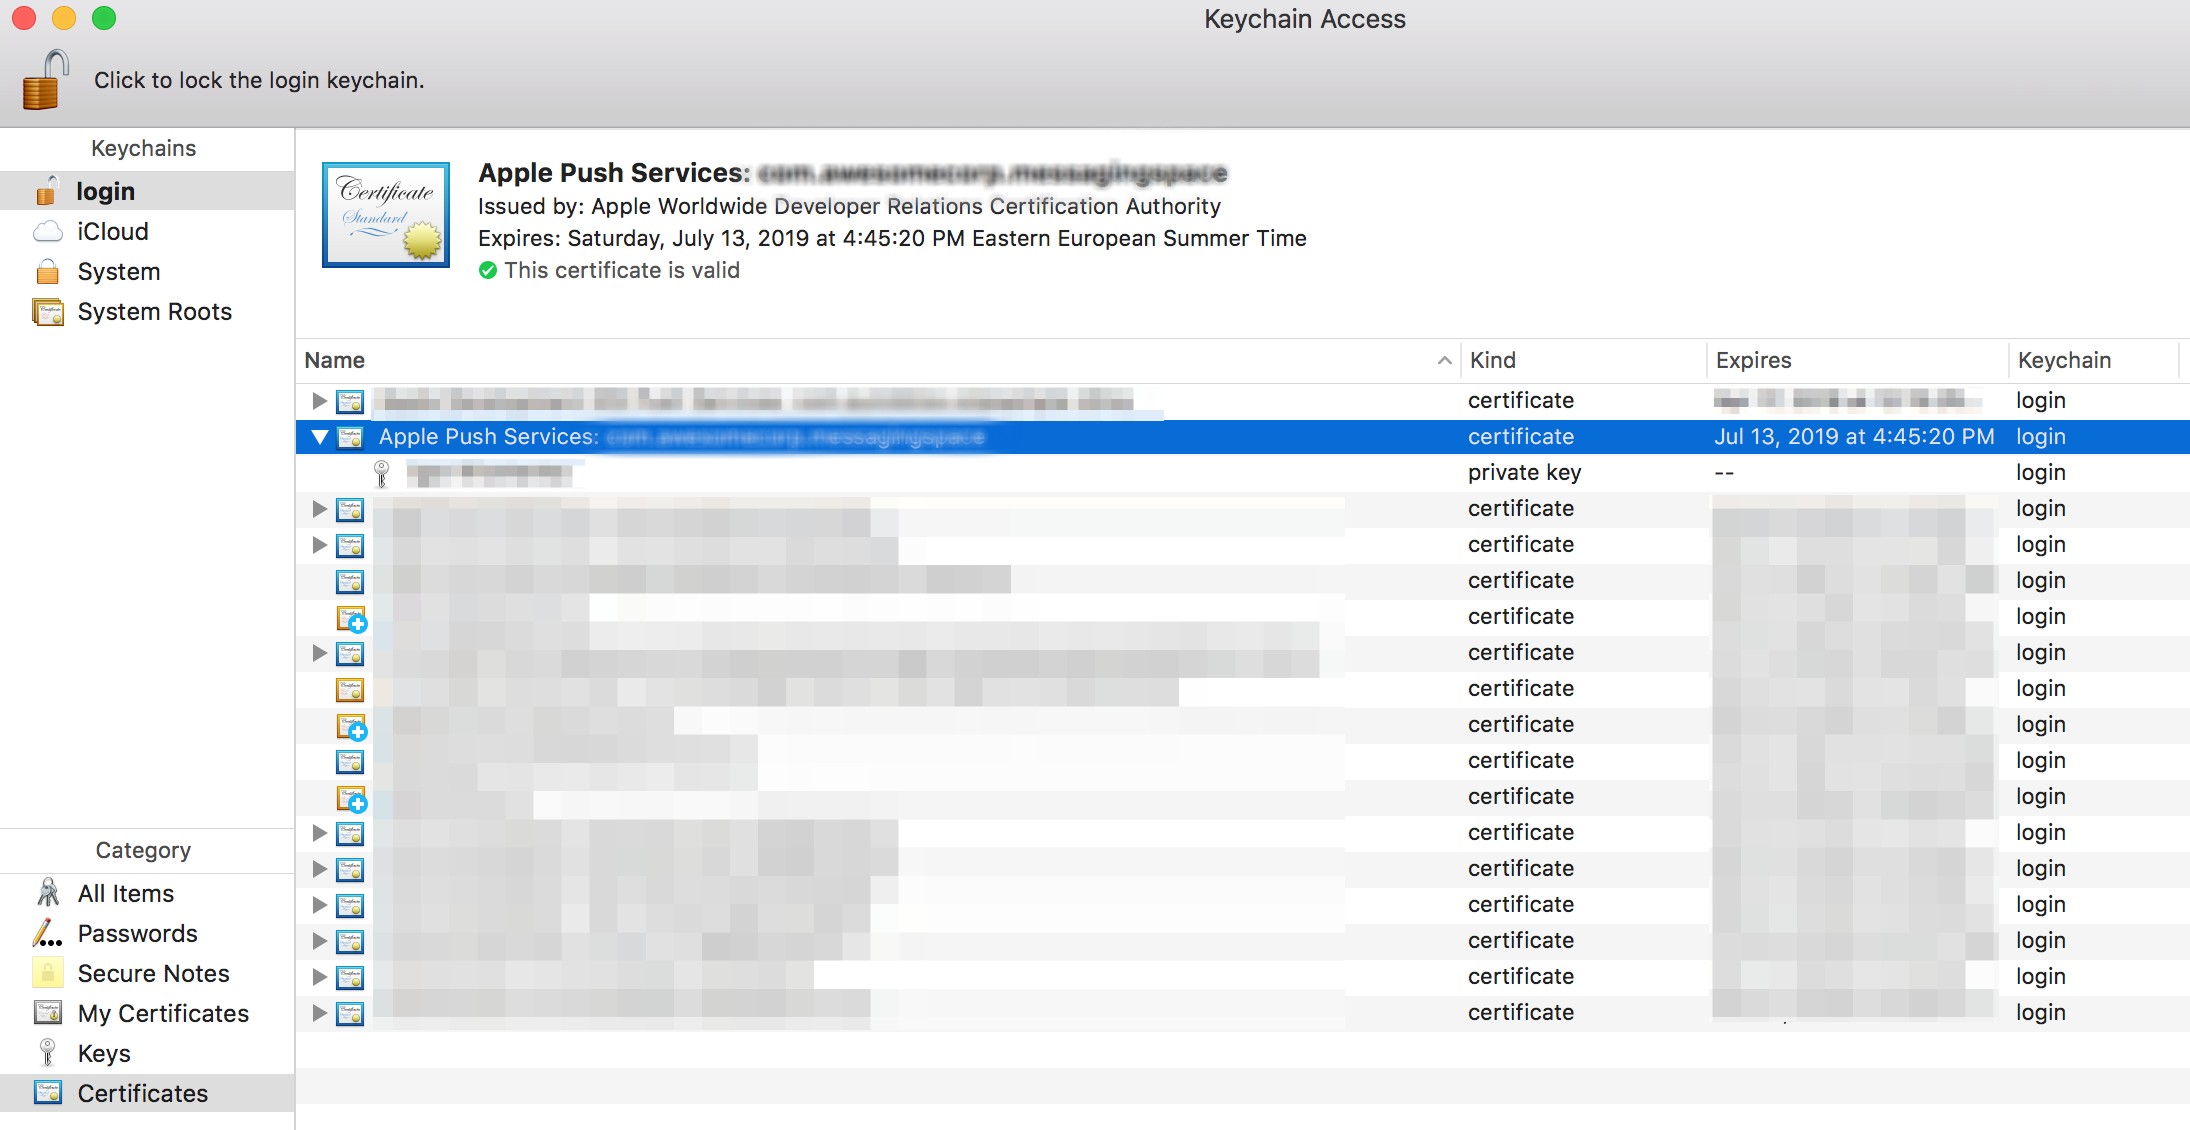
- Create .p12 file
Still in Keychain Access app, select Certificates option in the bottom section of the left sidebar. You will
now need to find the certificate you just made; it will have the name Apple Push Services: < Bundle
ID > and paired with a private key
 ×
×
![]()
- Right-click on this key and select Export "Apple Push Services ..." option. In the popup that appears, you can
call the file whatever you want, but make sure that File Format is set to Personal Information Exchange (.p12).
When exporting the certificate, you can provide a password for the p12 file.
Upload .p12 certificate to Dashboard
Note: Ensure you have created an App ID without a wildcard(make sure it doesn’t have an asterisk in it). Wildcard IDs cannot use the push notification service
You need to generate a certificate signing request file so that you can use it to request an APNS SSL certificate later on
On the Certificates, IDs & Profiles screen, select Certificates > All in the left sidebar and then click on the plus button in the top right corner:
Here we will create a single universal push certificate which is good for both Development and Production environments
Still in Keychain Access app, select Certificates option in the bottom section of the left sidebar. You will now need to find the certificate you just made; it will have the name Apple Push Services: < Bundle ID > and paired with a private key
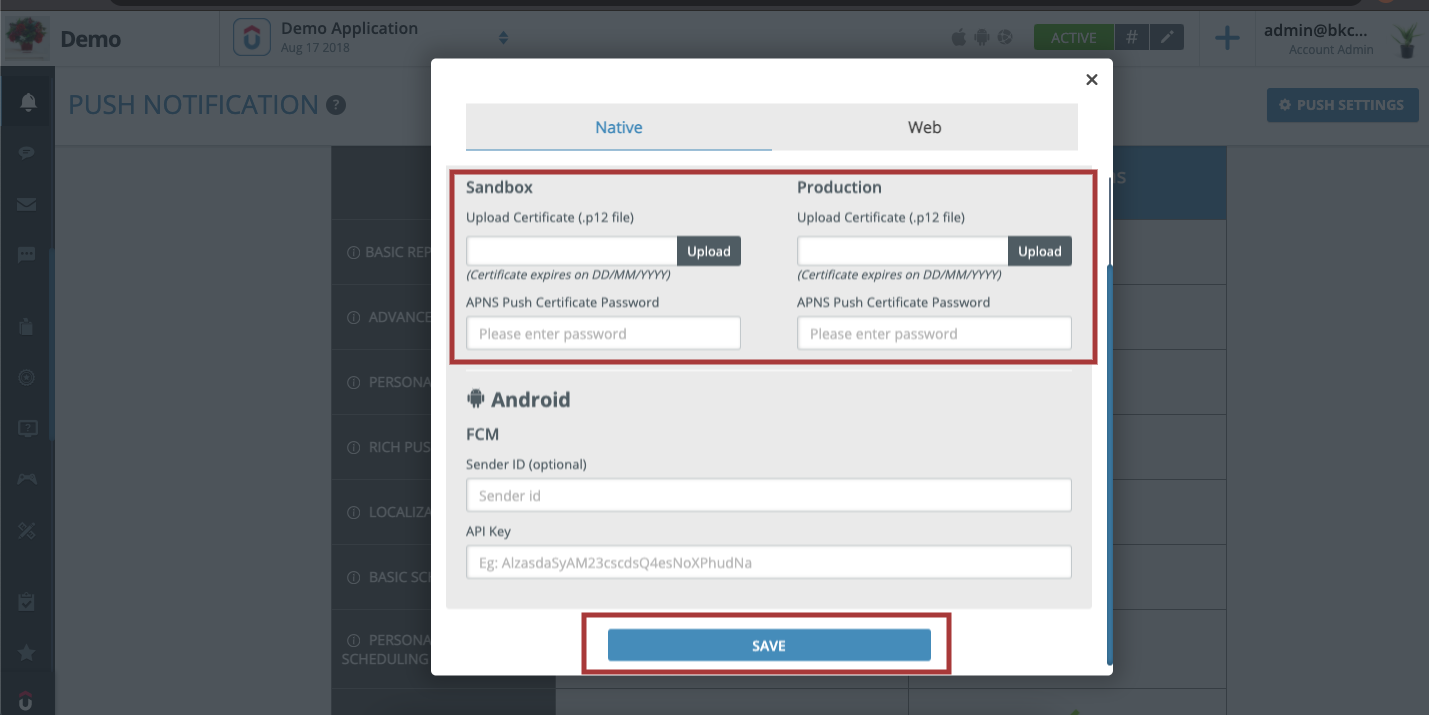
Upload .p12 push certificate to Upshot.ai dashboard under Push Notification Section. Select Push Notification in left menu -> click on push settings.
Upload Sandox Box and Production .p12 certificate and click on save.
Registering for Push notification:
After registering for remote notfications didRegisterForRemoteNotificationsWithDeviceToken or didFailToRegisterForRemoteNotificationsWithError callback will be invoked. And pass the token information to Upshot.ai as shown below
Sample Code:
BKExternalId *externalId = [[BKExternalId alloc] init]; [externalIdsetApnsID: pushToken];
[userInfosetExternalId:externalId];
[userInfobuildUserInfoWithCompletionBlock:^(BOOL success, NSError * _Nullable error) {
}];
let externalId = BKExternalId()
externalId.apnsID = pushToken
userInfo.externalId = externalId
userInfo.build { (status, error) in
}
Enhance/Rich Notification
iOS 10 brings us push notifications with Rich Media Attachment which includes viewing photos, videos, gifs and audio right there, within the notification.
Having these media attachments as a part of your notification is achieved with the use of the new Notification Service Extension. You can also have richer view controller level content within the media attachment view of the notification using Notification Content Extension.
NOTE:
Upshot.ai supports Rich Media Attachment and Push Notification Templates.
- Rich/Media Push notifications are enabled by using notification service extension
- Push Notfication Templates are enabled by using notfication content extesion.
- Upshot.ai will track the push notification view count automatically. For this, we need to enable App Groups in capabilities.
Below are the steps to enable enhance notifications.
Enable App Groups
Select you App Target -> Select Capabilities -> Search for App Groups and do the changes as shown in below.
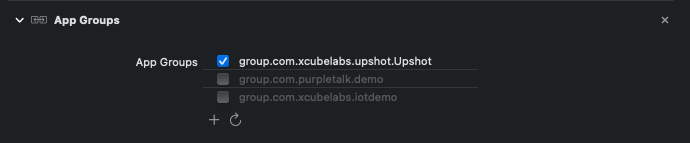
App Group ID Recommendation:
NOTE:
To support Push Notification View count and Templates, it is recommended to have a separate App Group ID set for Upshot.ai with a format group.{app bundle id}.Upshot.And make sure that the same group id is enabled for all the targets(AppTarget, Notification Service Extension, and Notification Content Extension).
- Enable App Groups for your target and enable app group ids, incase if you don't have an App Group ID then create new one with group.{app bundle id}.Upshot.
- Enable background mode and enable remote notifications
- Enable Push Notifications capability for your app.
Steps to setup Notification Service Extension:
- Create a Notification Service Extesion Target:
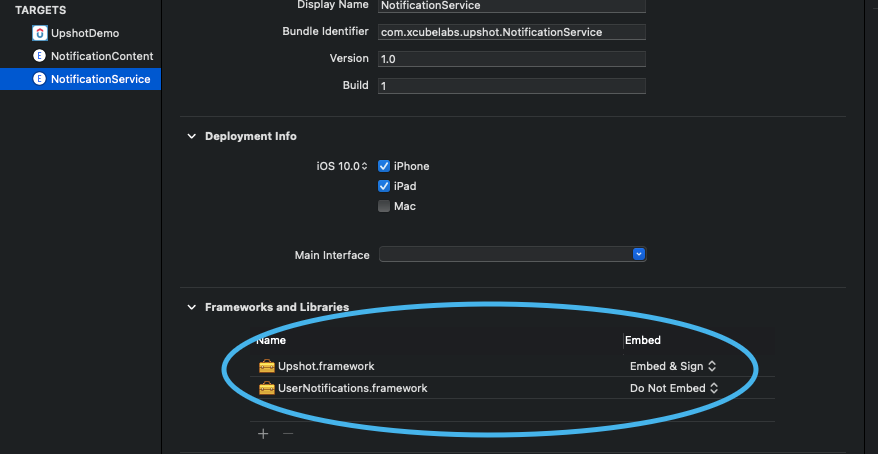
- Add UserNotifications framework to extension target:
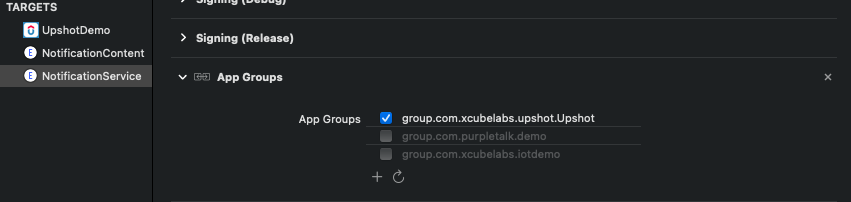
- Set the App Group ID for Extension:
- Code Level Changes:
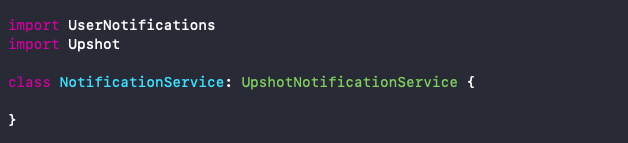
- import Upshot in NotificationService class.
- NotificationService extends with UNNotificationServiceExtension by default. Replace UNNotificationServiceExtension with UpshotNotificationService.
To create a notification service extension in your project, in Xcode, select File -> New -> Traget -> Choose Notification Service Extension template and activate.
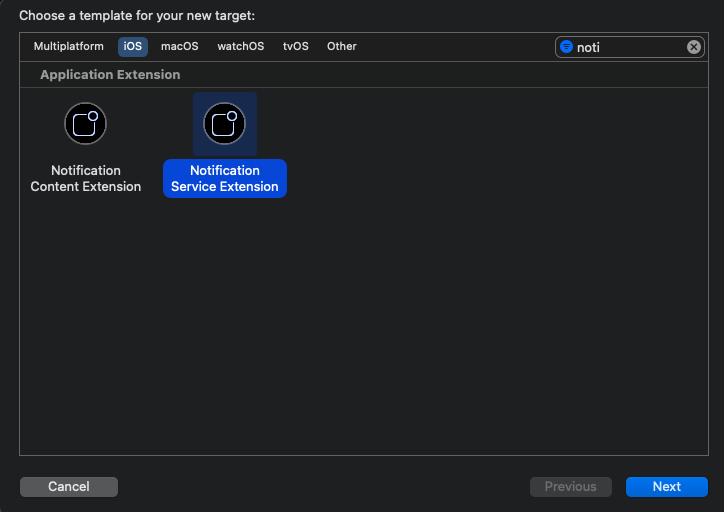
Set the name of the extension target and the programing language which you want to use.Activate the scheme for Extension when prompted for the same.
Add UserNotifications framework and Upshot.ai framework to Linked Frameworks and Libraries of notification service extension target as shown below:
Enable App Groups in for your notification service extension target and enable the same App group id which was selected for the App Target
Steps to setup Notification Content Extension:
- Create a Notification Content Extension Target:
- Add UserNotifications and UserNotificationsUI framework to extension target:
- Set the App Group ID for Extension:
- Info.plist Changes:
- StoryBoard Changes:
- Code Level Changes:
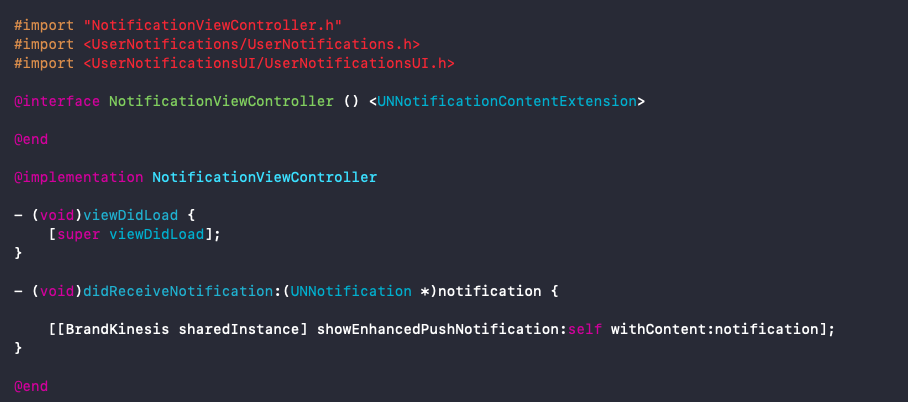
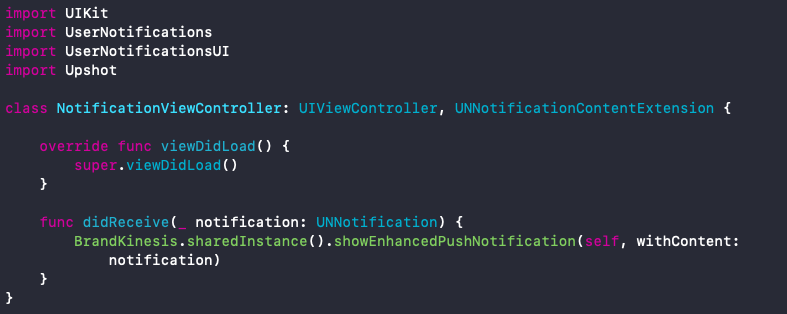
- import Upshot in NotificationViewController.
- Invoke showEnhancedPushNotification Upshot.ai method in didReceiveNotification method in NotificationViewController.m for Objective C as shown in below.
- Invoke showEnhancedPushNotification Upshot.ai method in didReceiveNotification method in NotificationViewController for Swift as shown in below.
- Caurosel Push Notification click callback
To create a notification service extension in your project, in Xcode, select File -> New -> Traget -> Choose Notification Content Extension template and activate.
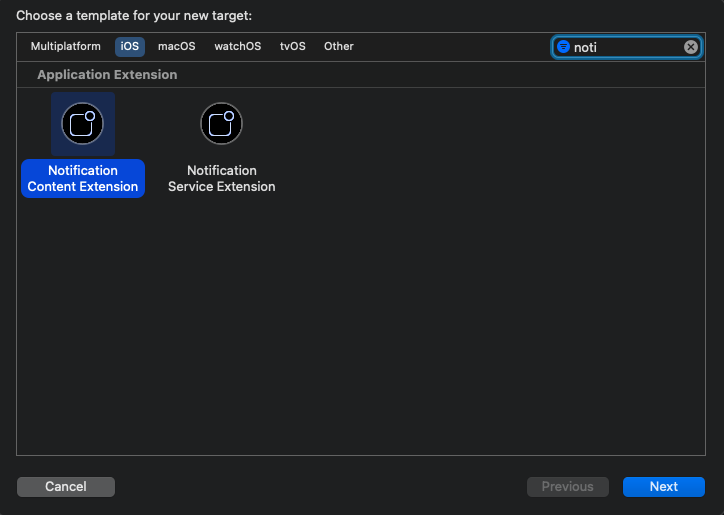
Set the name of the extension target and the programing language which you want to use. Activate the scheme for Extension when prompted for the same.
Add UserNotifications, UserNotificationsUI framework and Upshot.ai framework to Linked Frameworks and Libraries of notification content extension target as shown below. And set the deployment target to 12.0
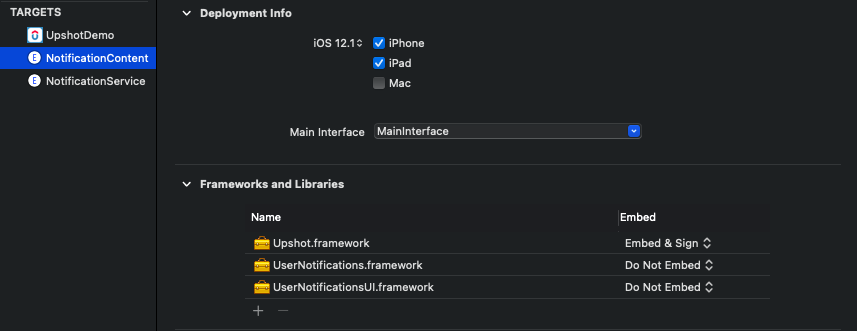
Set App Groups in your Notification Content Extension target and enable the same App group id which was selected for the App Target
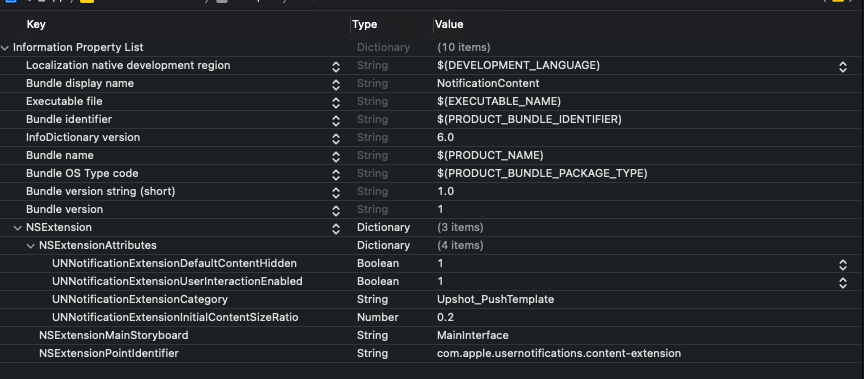
The changes in the Info.plist of your Notification Content Extension, as shown below, set NSExtensionAttributes as following
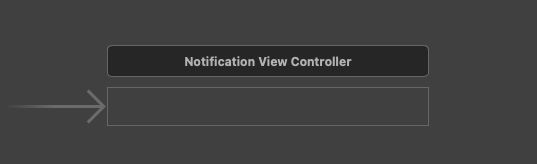
Select MainInterface.storyboard in your Content extension and remove the default label which is placed there and set the background color of the view to clear color, as shown below.
Sample Push Payload
}, "attachment-type" : "inline-image", "attachment-url" : "https://media.goupshot.com/bk-purpletalk/5d4d3f3f4ce8f387208b4585/si/56af50e0eaea3.jpg" , "bgColor" : "#EB0D8A", "bk" : "8dcc61363c6a456d54c22e01", "mColor" : "#898F8E", "tColor" : "#898F8E", "cType" : 1, "bk_mdata" : {
"activity" : 0, "cid" : "5bc6d386841d64a0768b47c4", "msgId" : "8dcc61363c6a456d54c22e01" }
}
Send Push Click Detailsto Upshot.ai
Upshot.ai provides push notification click reports and ability to send InApp Notifications along with PushNotifcations. To Support this send push click payload to Upshot.ai
When a user taps on the notification based on the app state and OS version below, notification delegates will be invoked. Send UserInfo payload whenever callback is invoked.
- didReceiveRemoteNotification: fetchCompletionHandler
- userNotificationCenter(_ center: UNUserNotificationCenter, didReceive response:
Sample Code:
}